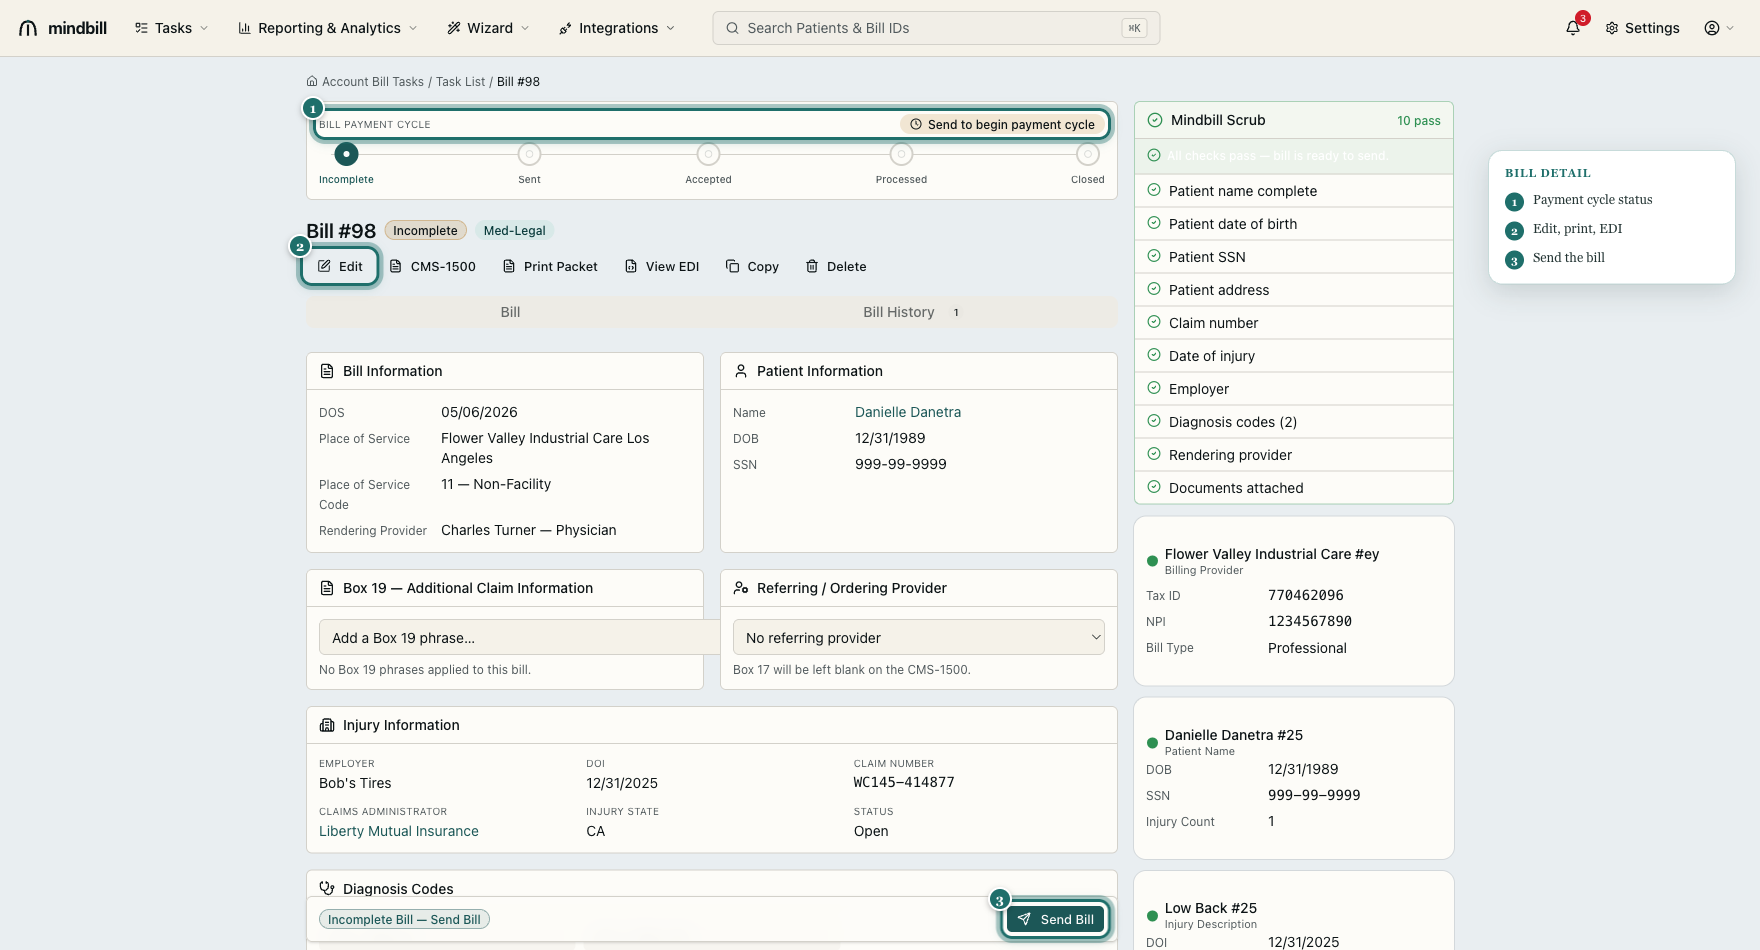
How to add a bill
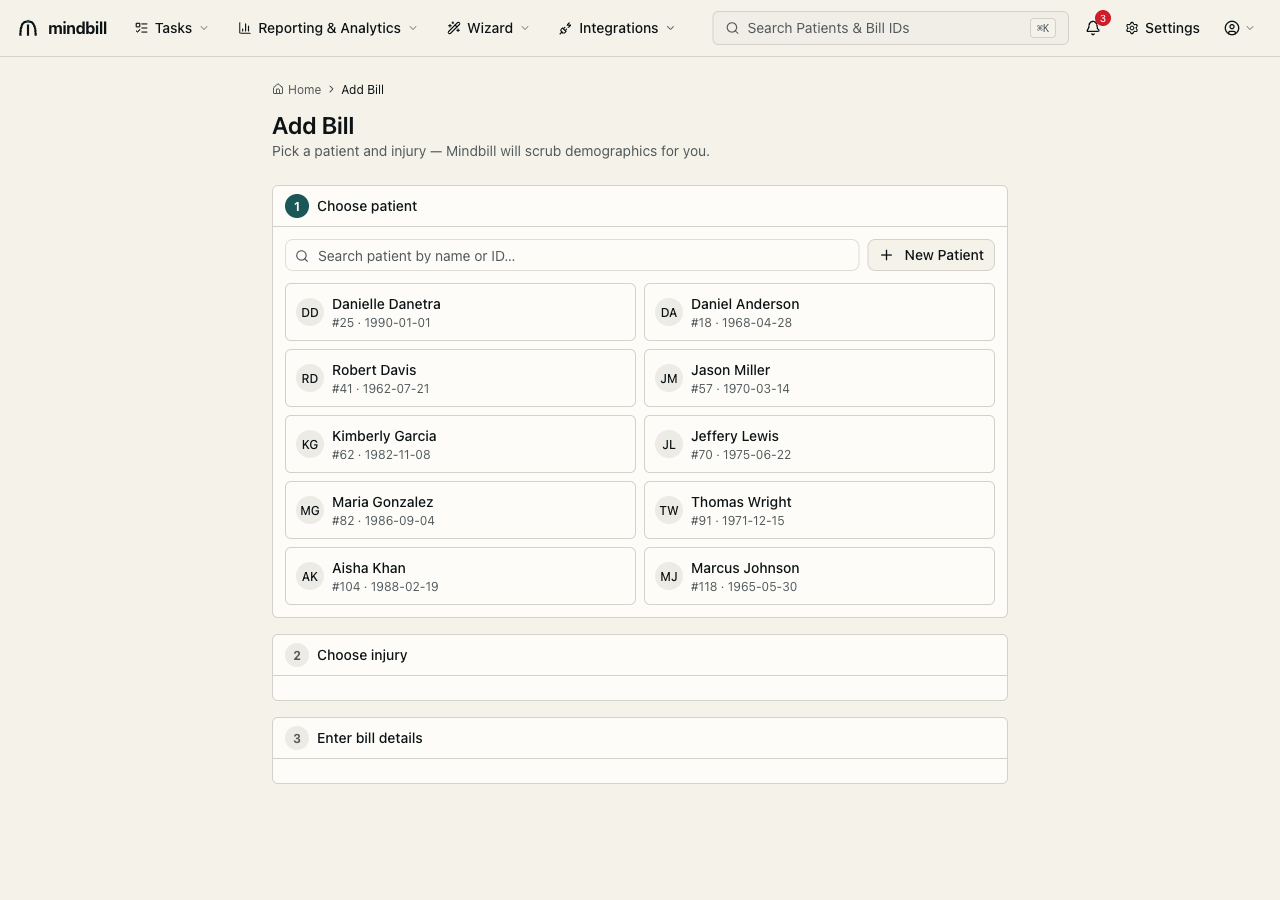
Step 1 — Choose the patient
Start a new bill from New Bill in the top nav (the report-drop intake flow) or Add Bill on a patient's page. The Choose patient directory lists every injured worker with name, patient ID, and date of birth. Search for the injured worker by name or ID, then click their card to select them. Mindbill scrubs demographics automatically, so you never re-key an address or DOB. Don't see the patient? Click New Patient to add them inline without leaving the flow.
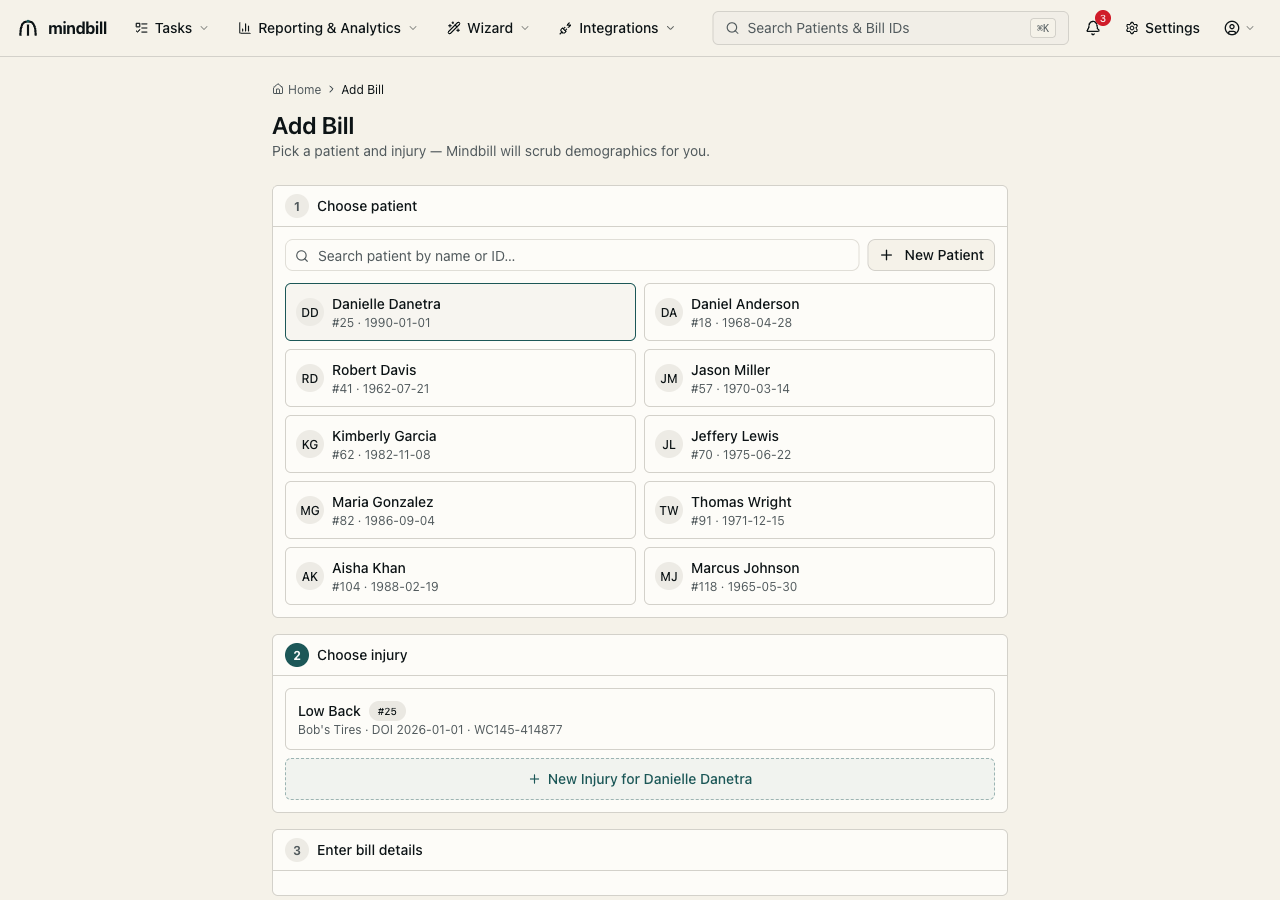
Step 2 — Choose the injury
Pick the injury the bill is filed against — every bill is filed under one injury, with one date of injury, one claim number, and one claims administrator. Each injury card shows the employer, the date of injury, and the claim number (e.g. Low Back · Bob's Tires · DOI 2026-01-01 · WC145-414877). Pick the relevant injury, or click New Injury if this is a fresh claim. Mindbill then confirms the patient and injury before you open the bill entry form.
Step 3 — Enter bill details: set the required fields
The third numbered step, Enter bill details, opens the bill-entry dialog — and everything from here on happens inside it. Start with the required fields: the date of service, the place of service, and the rendering provider. The ICD-10 diagnosis codes come straight from the injury, so they're already populated. A one-click Bill Template picker jump-starts the common stacks — QME Comprehensive (ML201 + MLPRR), AME Comprehensive (ML201 + 94 + MLPRR), Psych QME (ML201 + 96 + MLPRR), Deposition Testimony (ML204), or Missed QME (ML200) — pre-filling the right ML codes and modifiers. (The Bill Template picker is hidden for the Spectrum org, which builds its lines code by code.)
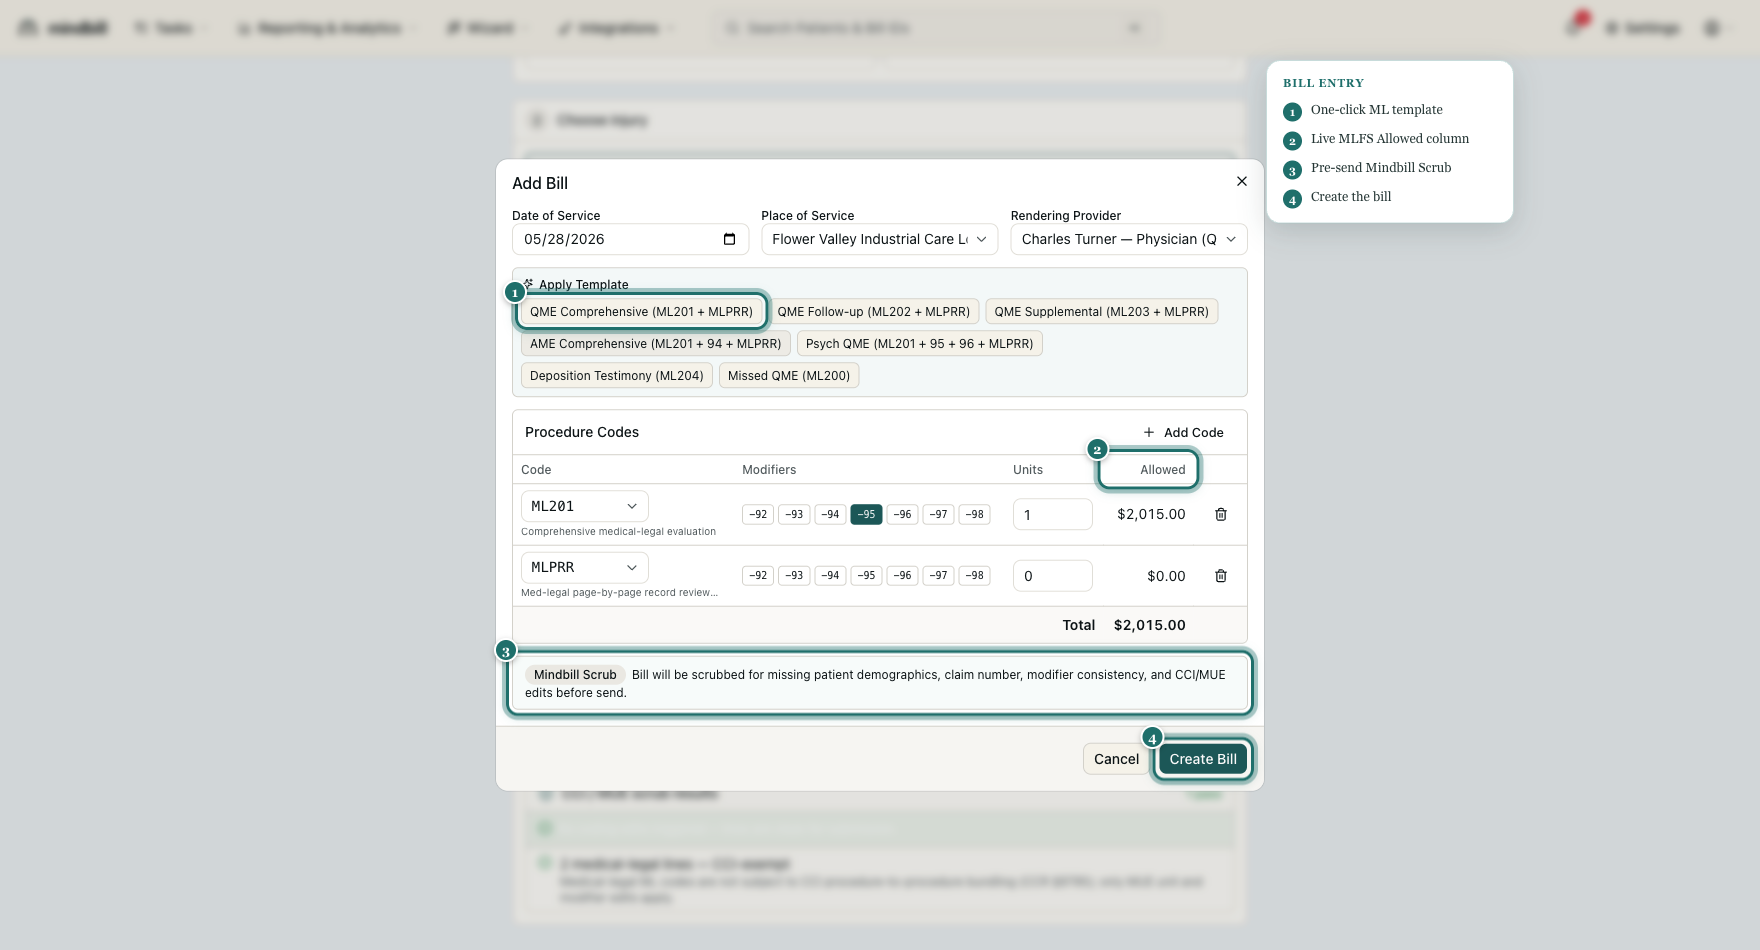
Step 3a (in the dialog) — Build the service lines
Still inside the bill-entry dialog, build the service lines. Set the units and Mindbill reprices each line against the fee schedule instantly in the Allowed column (ML201 = $2,015.00). Open the modifier picker to add a medical-legal modifier — remember the 92–98 modifiers multiply rather than add. Then add another line and search the code lookup, which carries medical-legal and CPT codes together, so a comprehensive evaluation and an ancillary procedure can share one bill.
Step 3b (in the dialog) — Watch the live CCI/MUE scrub
As you build the lines, the Mindbill Scrub runs on your real bill — the CCI and MUE edits check the lines as you go, flagging things like a units overage or a duplicate date of service before you ever submit. It also pre-checks missing demographics, the claim number, and modifier consistency. Resolving a flag here is how you keep a bill from bouncing as a payer rejection later.
Step 3c (in the dialog) — Save to drafts, or create the bill
When the lines are right, save the bill to drafts to finish later, or create it now. Create Bill closes the dialog and lands you on the bill detail page: across the top is the payment cycle (Incomplete → Sent → Accepted → Processed → Closed) with the current status badged, and below it the bill, patient, and injury panels, the diagnosis and procedure codes, the totals against the fee schedule, and the Box 19 phrase library. The bill starts in Incomplete, ready to attach the report and send. From here you can also Edit, print the CMS-1500, view the EDI, copy, or delete the bill.