How to send a bill to the clearinghouse
Step 1 — Open a bill cleared for submission
Start on your dashboard. Today's Focus surfaces the bills cleared for submission — open the one you're ready to send. (You can also open any finished bill from the bill list.)
Step 2 — Review the bill
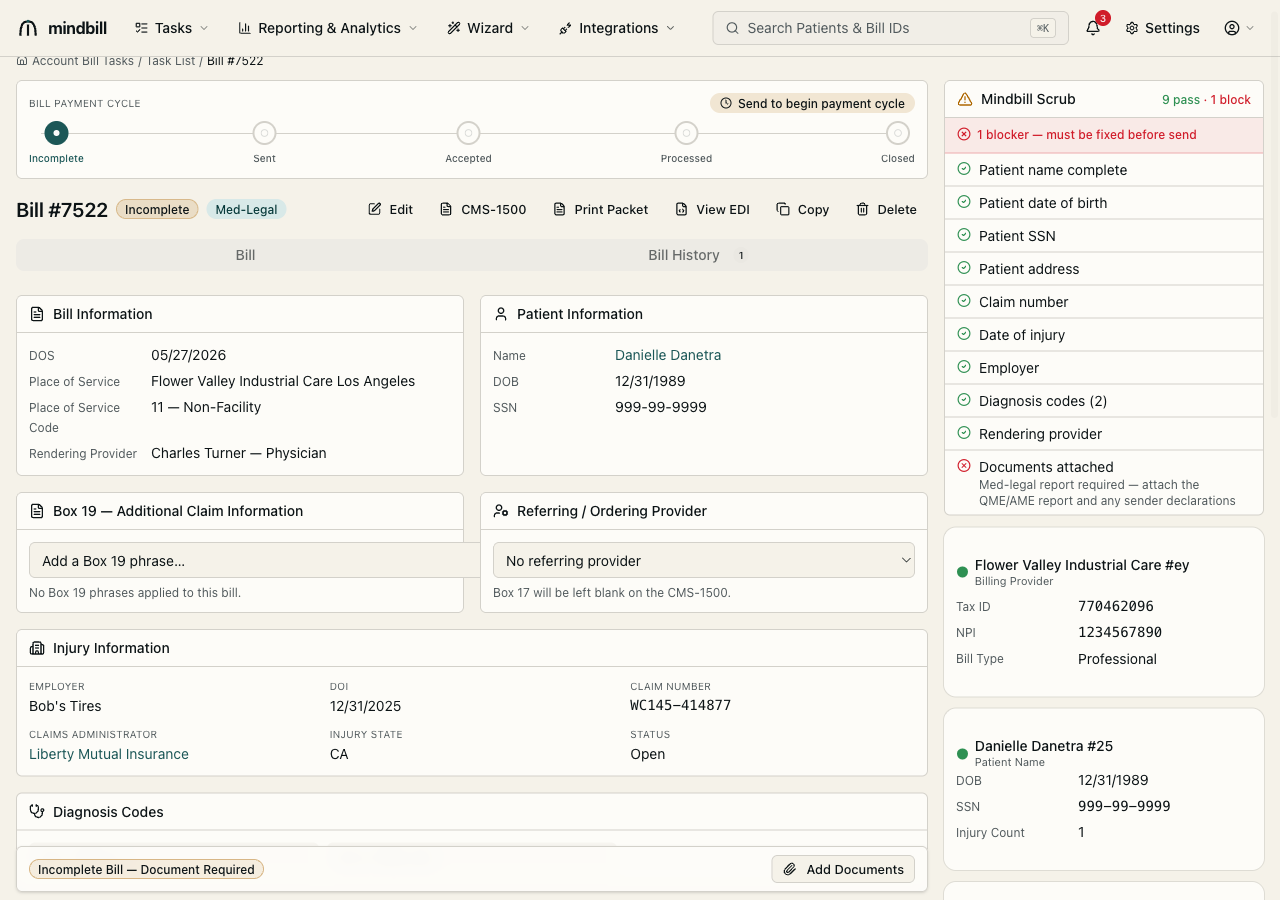
Review the bill before it goes out: the patient, the date of service, the rendering provider, the diagnosis and procedure codes, and the totals — your finished CMS-1500. This is the last look at exactly what the claims administrator will receive.
Step 3 — The live scrub flags the report
The live Mindbill Scrub runs on the real bill, listing every pre-flight check with a pass/block count. It validates the patient, the claim, the diagnosis codes, and the rendering provider — and here it's holding on one blocker: a medical-legal bill can't go out without the evaluation report attached. A red blocker is exactly the kind of defect that triggers a payer rejection or a silent delay.
Step 4 — Attach the QME/AME report
So attach it. Open Add Documents and drop in the QME or AME report — the substantial medical evidence the claims administrator requires. If the bill includes MLPRR (record review beyond the included 200 pages, billed at $3/page), also attach the LC §4062.3 sender declaration attesting the page count under penalty of perjury, or the MLPRR line becomes the single most-rejected med-legal charge.
Step 5 — The scrub clears, all green
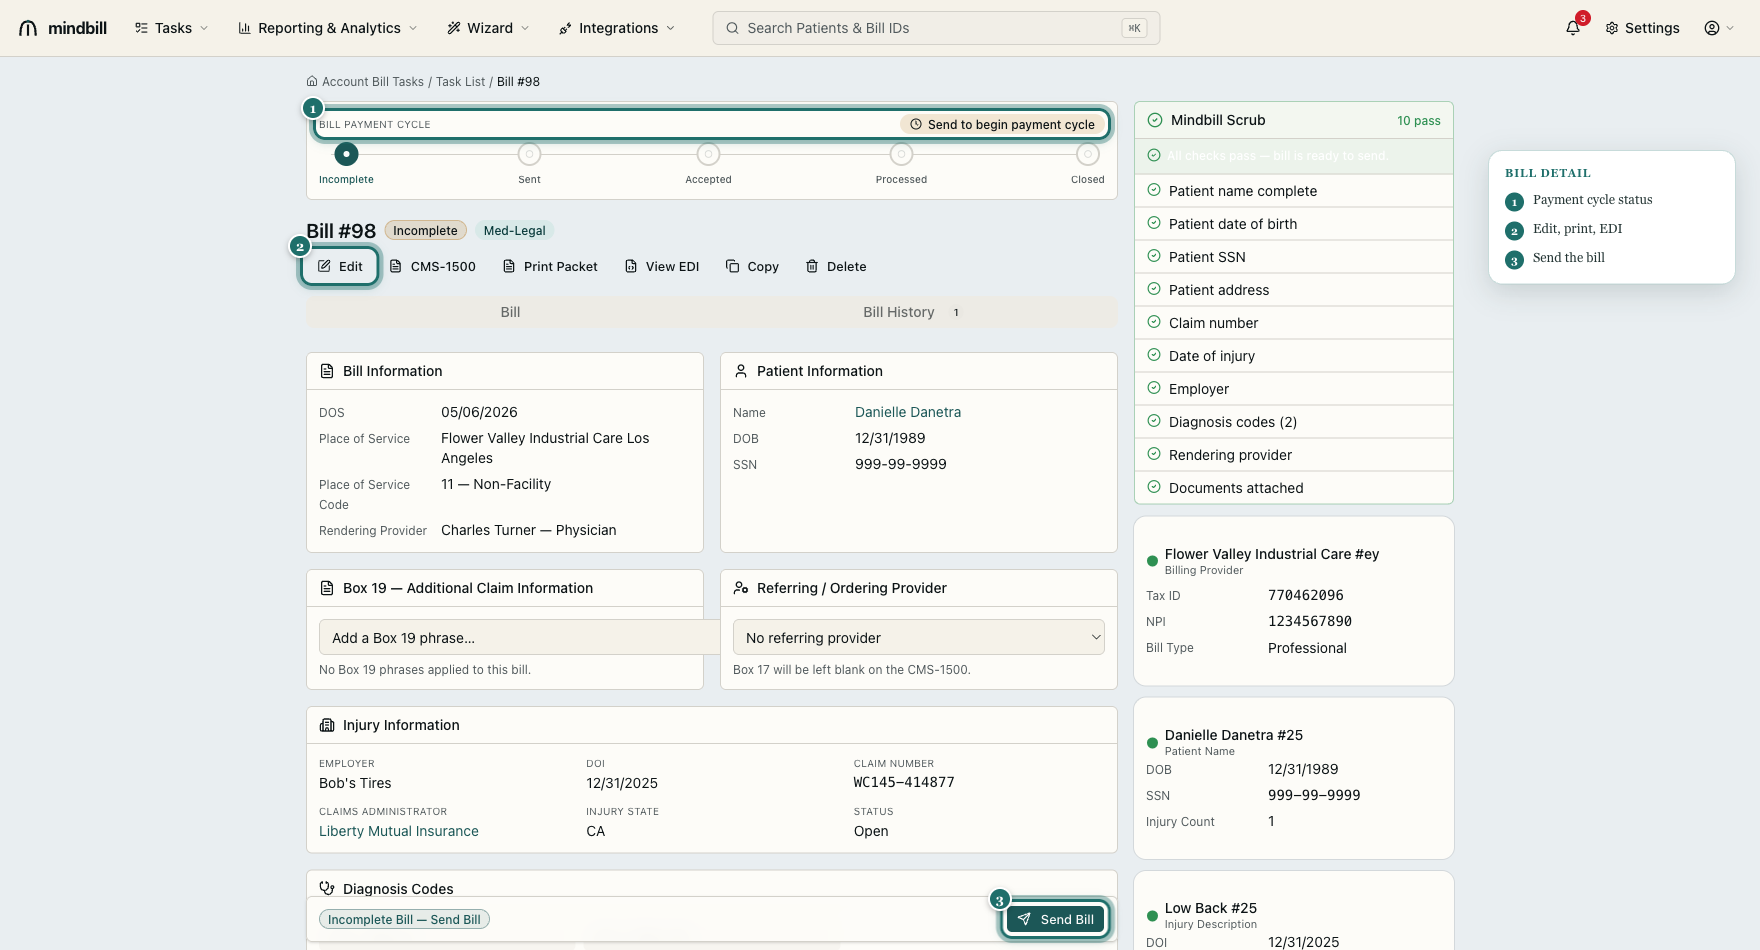
And the scrub clears. Every check passes — patient, claim, codes, provider, and now the report — and the bill is ready to send. Mindbill only opens the send path once every blocker is resolved, which is the safety net that stops an incomplete bill from going out and bouncing back.
Step 6 — Send: Mindbill resolves the route
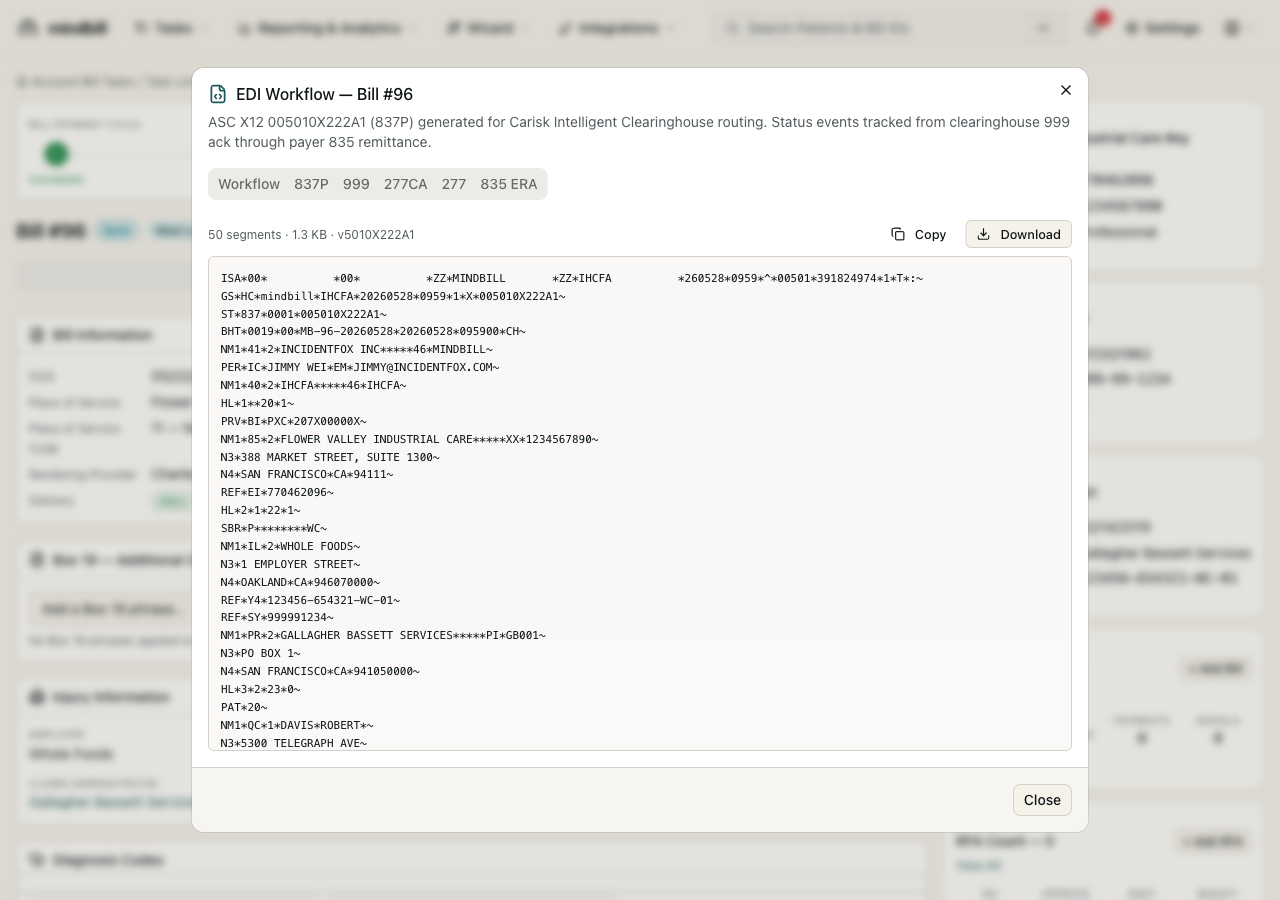
Hit Send and Mindbill resolves the route for you — an auto-waterfall to the payer over the right clearinghouse (here, Data Dimensions; Carisk is primary and Jopari covers the rest), with fax and mail as manual overrides for paper-only payers. It builds the ASC X12 005010X222A1 (837P) professional claim, a real EDI envelope you can inspect segment by segment via View EDI — so you never choose a clearinghouse or hand-build a segment.
Step 7 — Submit, and the payment cycle begins
Click Submit and the bill is on its way. It moves to Queued, marked Submitted — the payment cycle has begun. From here it advances itself as inbound EDI arrives: the 999 confirms the clearinghouse received the file, the 277CA confirms the payer accepted the claim, the 277 reports status, and the 835 ERA posts the payment — each parsed, matched to the bill, and timestamped on the bill history.