Working the bill list
Step 1 — Pick a status group
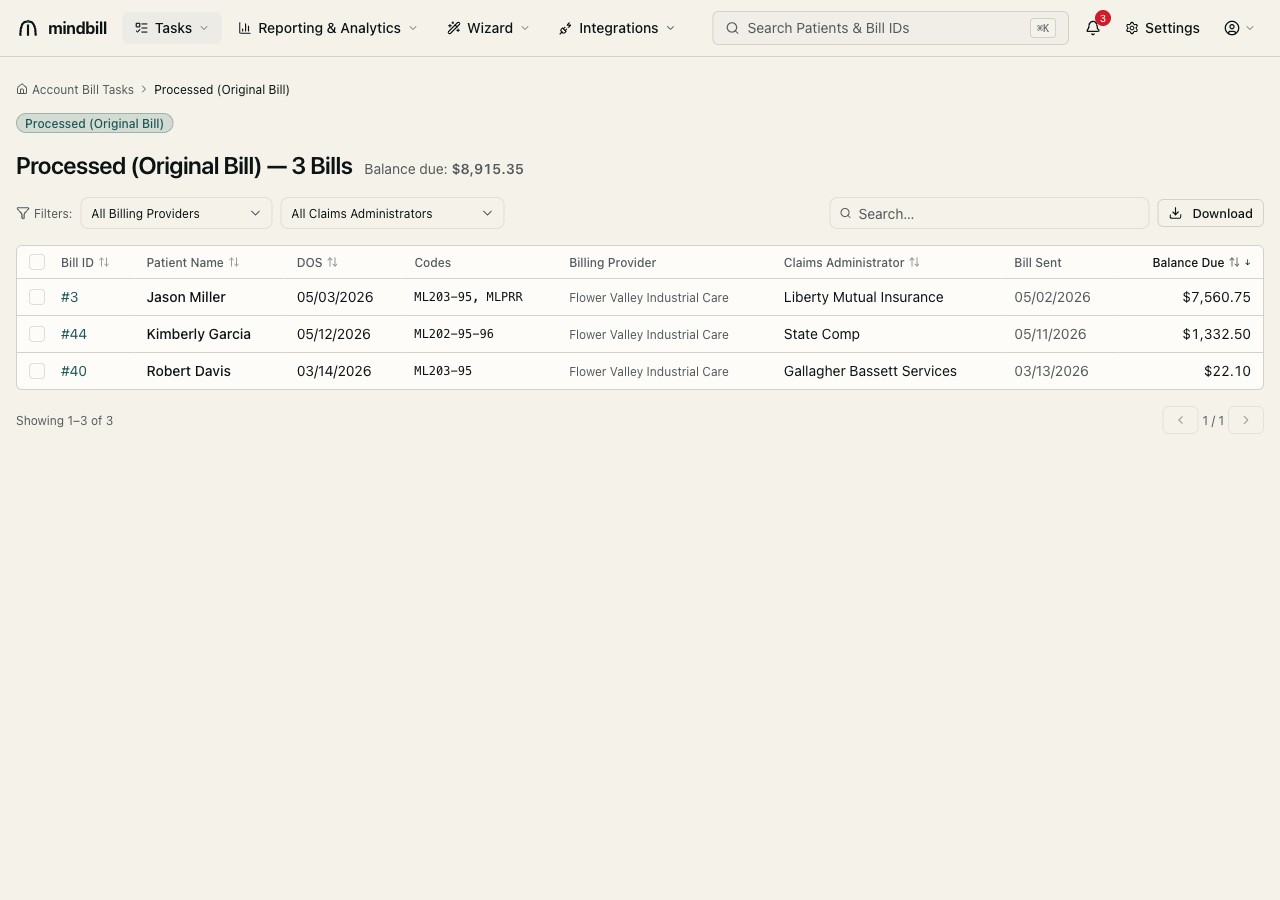
Bills are organized into status groups that mirror the payment cycle — Incomplete, Sent, Accepted, Processed, Denied, Rejected, and Appealing. Choose a group (e.g. Processed (Original Bill) — 3 Bills) and the header tallies its count and total balance due ($8,915.35 in this view), so you always know what's outstanding in the bucket you're working. The columns — Bill ID, Patient Name, DOS, Codes, Billing Provider, Claims Administrator, Submitted / A/R Age, and Balance Due — give you the whole picture at a glance. A/R age always starts when the bill was submitted, not on the date of service.
Step 2 — Filter, search, and sort
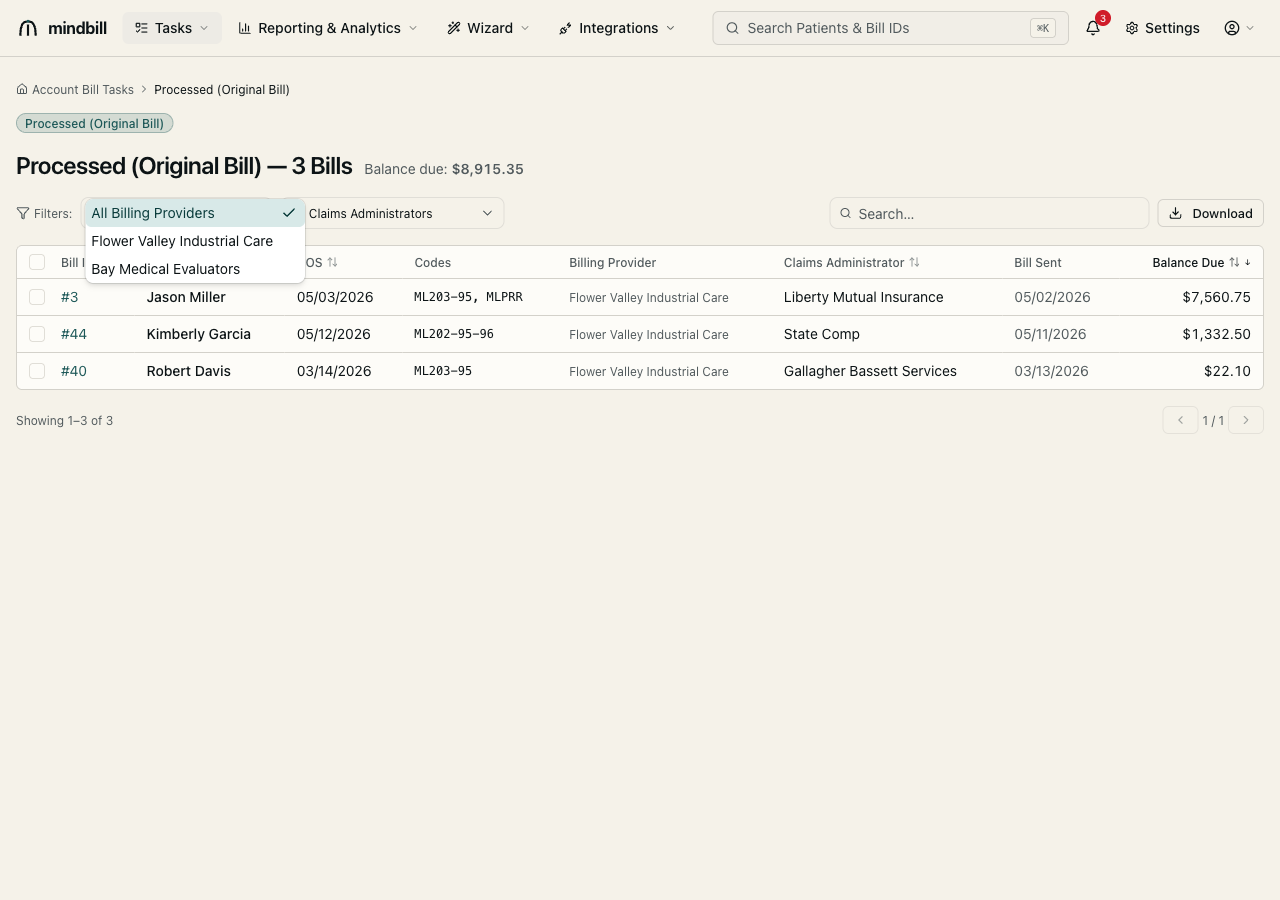
Narrow the list with the filter row: All Billing Providers and All Claims Administrators scope the table to one practice entity or payer, while A/R Age selects bills submitted 0–30, 31–60, 61–90, or 91+ days ago. Search by patient name or bill ID, and click Submitted / A/R Age or Balance Due to sort. Click any row to open that bill's detail page.
Step 3 — Export the filtered view to CSV
Once the list reflects exactly the bills you want — a status group, payer, A/R bucket, and sort order — click Download CSV to export every matching bill, not only the visible page. The export includes submission date, A/R age in days, A/R bucket, billed, paid, and balance due so it can be used directly as an aging worklist.